This post may contain affiliate sales links. Please read my disclosure policy.
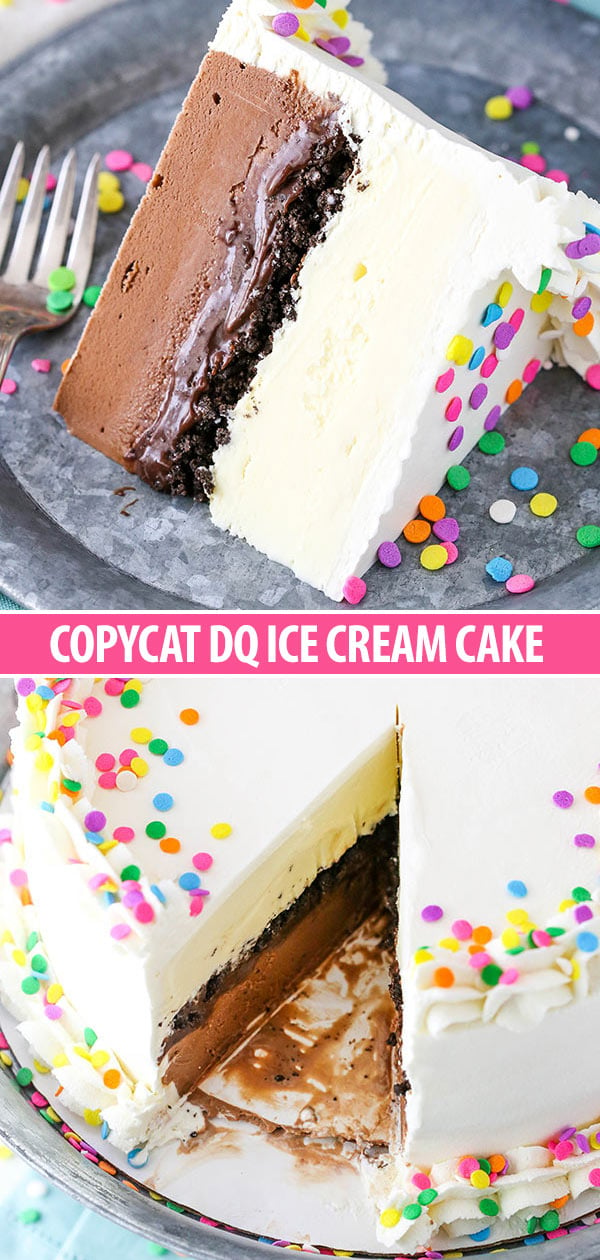
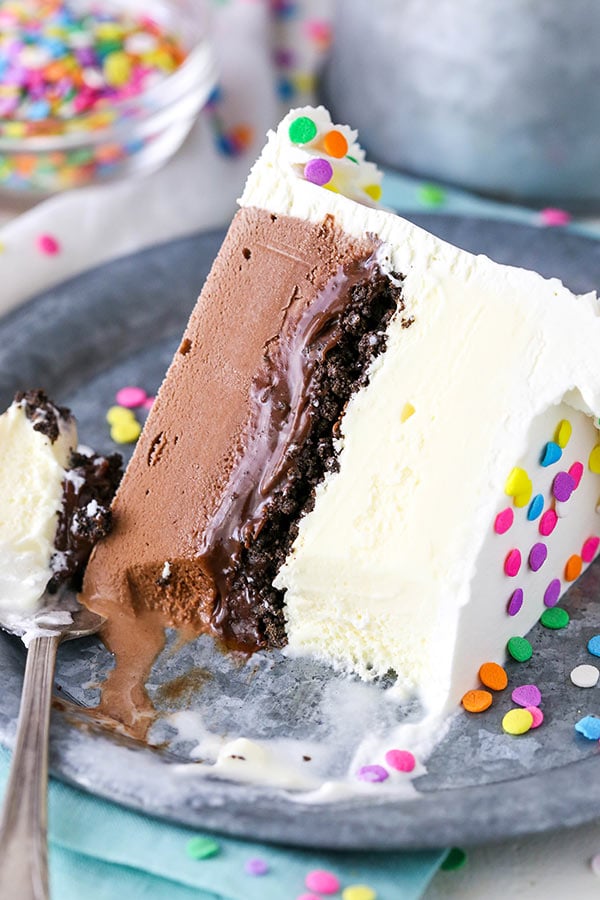
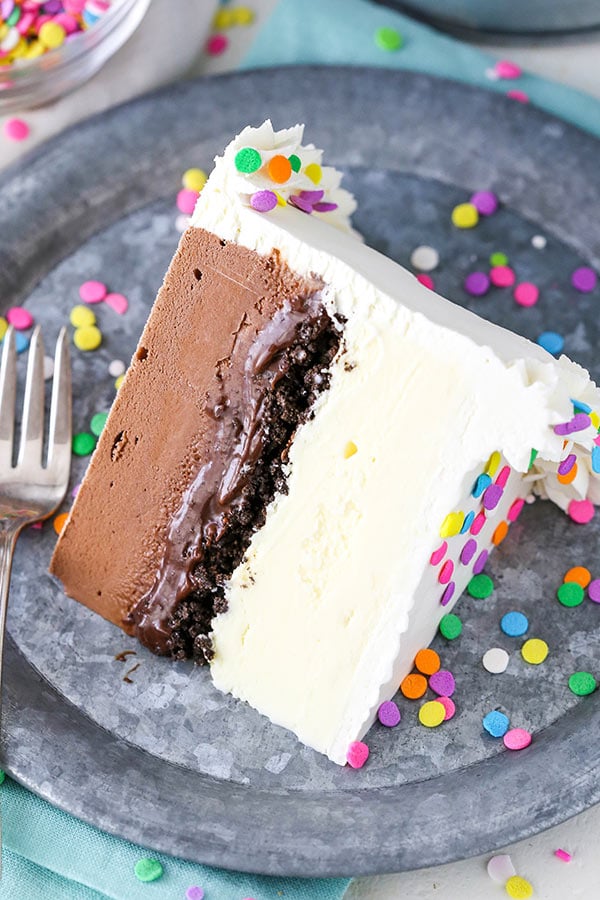
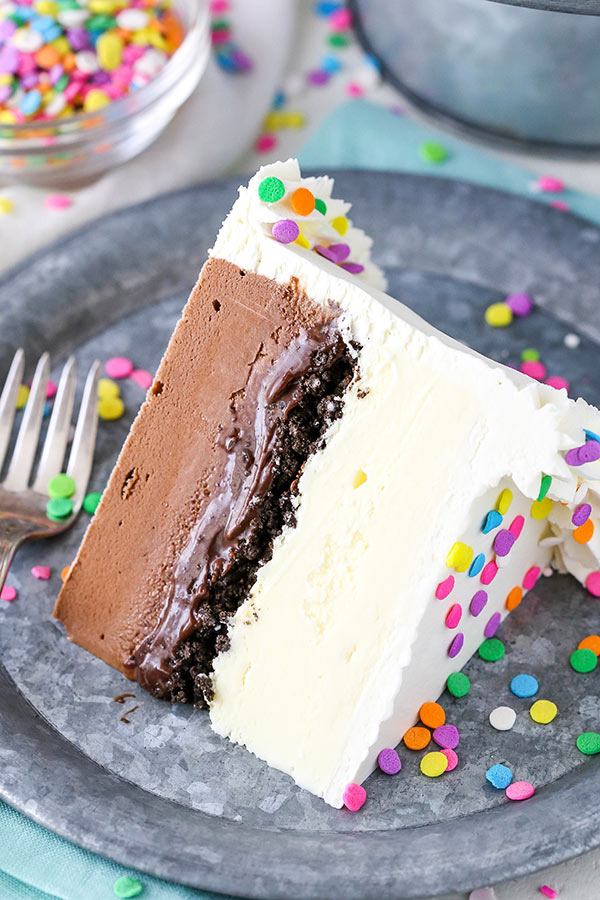
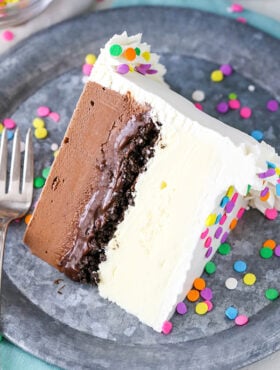
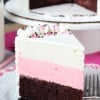
This Copycat Dairy Queen Ice Cream Cake has layers of chocolate and vanilla ice cream around the iconic layer of chocolate crunchies and chocolate fudge. It is so easy to make and tastes just like the real thing!
Easy Copycat Dairy Queen Ice Cream Cake
As a kid, I rarely had the same birthday cake twice. I like all kinds of cake too much to stick with one. Regular cake, cheesecake, ice cream cakes – you name it. The only one I didn’t need to have for my birthday was a cookie cake, because I knew I could depend on my dad for that one at his birthday. So naturally, I’ve tried quite a few cakes – including ice cream cakes.
So, these days I feel like I’m a bit of an ice cream cake connoisseur. There’s definitely something to love about all the different kinds available, but when it comes to a Dairy Queen ice cream cake, that middle layer of chocolate fudge along with the chocolate crunchies is pure heaven. Often, I’d just dig that right out from between the ice cream and eat it alone. So darn good!
When I started playing around with ice cream cakes several years ago, I did a fair amount of experimenting with that middle fudge layer and finally perfected it. I’ve shared it before, but never for this copycat cake so I’m excited to share it with you today.

How to Make An Ice Cream Cake
First let’s talk about the cake pan. I used an 8 by 3 inch cake pan, because I prefer a taller cake. You could definitely use a 9 inch pan though, and a springform pan would certainly be convenient. All according to what you’re going for.
Once you’ve got your pan, you’ll want to line the inside of it with clear wrap. Now it’s time to make your cake!
- Chocolate Ice Cream: Add your chocolate ice cream and spread it evenly into the pan. Pop the pan and ice cream into the freezer for about 30 minutes so it firms up just a bit.
- Chocolate fudge layer: You’re actually going to make chocolate ganache – it’ll just be a little thinner than normal and have some corn syrup in it. The corn syrup is really essential here. It helps it stay softer even when frozen, giving it that fudgy consistency. It’s not too firm and not too soft and drippy. The fudge layer is added on top of the ice cream and then frozen for another 10 minutes or so.
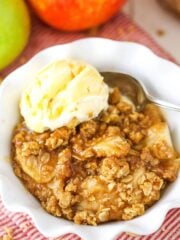
- Chocolate crunchies: You’re going to use Oreo crumbs and some melted butter for this layer. Mix the crumbs and butter together, spread them evenly onto a baking sheet and bake for about 8 minutes. As it cools, break it up into smaller pieces so you have the perfect little chocolate crunchies. They are seriously perfect! They aren’t big chunks of Oreos (yay!), but because they’ve been baked a bit they still keep their crispiness even when added to the ice cream cake. Perfection!Add the chocolate crunchy layer and then pop it back in the freezer for about two hours, so the cake can firm up and the layers stay even.
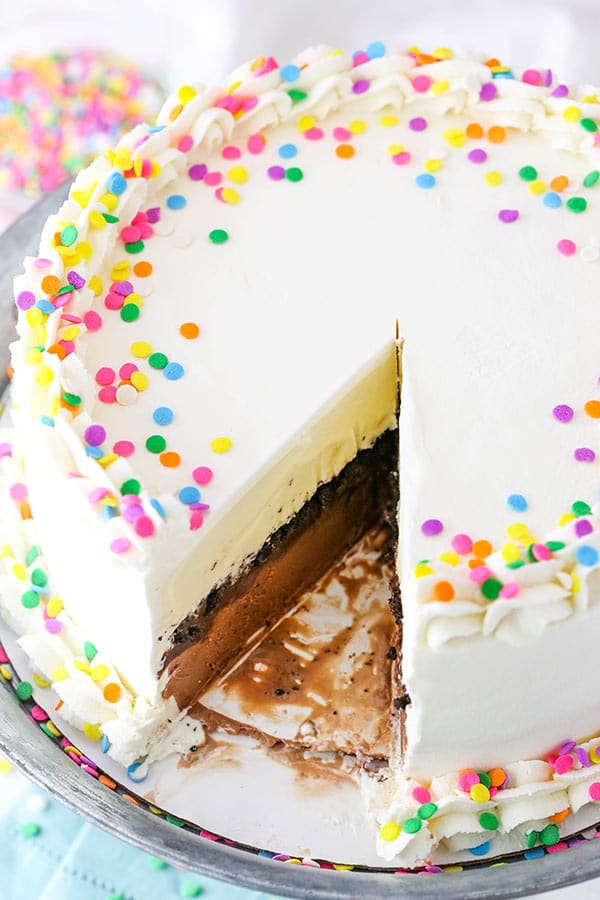
- Vanilla ice cream: Add the vanilla ice cream on top and freeze the cake until it’s firm. When it’s done, frost it with my homemade whipped cream. It uses some powdered sugar to keep it from wilting. It stays stable for days and days making it ideal for an ice cream cake. Decorate the ice cream cake as you like for your occasion and you’re ready to go!
This is seriously the BEST Copycat Dairy Queen Ice Cream Cake! The middle fudge and crunchy layer is pure perfection. You will love it. And just like when I was a kid, you will want to eat the chocolate fudge and chocolate crunchy layer right out of the center!
HOW TO STORE AN ICE CREAM CAKE
This ice cream cake is actually a great recipe to make ahead. You can layer everything together, cover it and leave it in the pan you built it in. It should be fine sitting in the pan for about a week ahead of time. Then you can frost it the of or the day before you need it so that the decorations looks nice and fresh.
After decorating, it’s ideal to store it in a container (such as a cake box or cake carrier) in the freezer. If you don’t have a container that size or space in your freezer, it’ll be fine for a few days in your freezer.
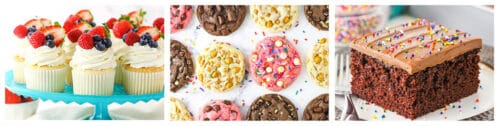
You might also enjoy
Strawberry Crunchy Ice Cream Cake
Peanut Butter Chocolate Ice Cream Cone Cake
S’mores Ice Cream Cake
Oatmeal Chocolate Chip Cookie Ice Cream Cake
Red Velvet Ice Cream Cake
Chocolate Chip Cookie Dough Ice Cream Cake
Oreo Cookies and Cream Ice Cream Cake
Shop the post

[adthrive-in-post-video-player video-id=”bo424f99″ upload-date=”2022-09-26T18:55:25.000Z” name=”Copycat Dairy Queen Ice Cream Cake” description=”This Copycat Dairy Queen Ice Cream Cake has layers of chocolate and vanilla ice cream around the iconic layer of chocolate crunchies and chocolate fudge. It is so easy to make and tastes just like the real thing!” player-type=”default” override-embed=”default”]
Read Transcript
Copycat Dairy Queen Ice Cream Cake
- Prep Time: 5 hours 15 minutes
- Cook Time: 10 minutes
- Total Time: 5 hours 25 minutes
- Yield: 12-14 slices
- Category: Dessert
- Method: Oven
- Cuisine: American
Description
This Copycat Dairy Queen Ice Cream Cake has layers of chocolate and vanilla ice cream around the iconic layer of chocolate crunchies and chocolate fudge. It is so easy to make and tastes just like the real thing!
Ingredients
Chocolate Cookie Crunchies
- 3/4 cup (100g) Oreo crumbs (about 9 Oreos)
- 1 1/2 tbsp butter, melted
Ice Cream Layers
- 1.5 quart container vanilla ice cream
- 1.5 quart container chocolate ice cream
Chocolate Fudge
- 6 oz | 1 cup semi sweet chocolate chips
- 3 tbsp light corn syrup
- 1/2 tsp vanilla extract
- 1/2 cup (120ml) heavy whipping cream
Whipped Cream
- 2 cups (480ml) heavy whipping cream, cold
- 1 cup (115g) powdered sugar
- 1 1/2 tsp vanilla extract
- Sprinkles
Instructions
1. Preheat oven to 350 degrees. Line a cookie sheet with parchment paper or a silicone baking mat and set aside.
2. Combine the Oreo crumbs and melted butter and stir until well combined. Spread the crumbs evenly onto the prepared cookie sheet.
3. Bake for 8-10 minutes, then allow to cool. Use your fingers to break any big clumps into smaller ones. Set aside.
4. Line an 8×3 inch cake pan* with clear wrap that covers the bottom and goes above the sides of the cake pan. I used two pieces.
5. About 20 minutes before you need it, set the chocolate ice cream out to soften. Once softened, stir it up until smooth and creamy. Add the softened chocolate ice cream to the prepared cake pan and spread into an even layer. Freeze for 30 minutes.
6. To make the fudge layer, add the chocolate chips, corn syrup and vanilla extract to a medium sized bowl.
7. Heat the heavy whipping cream just until it begins to boil, then pour it over the chocolate chips. Allow to sit for 2-3 minutes, the whisk until smooth.
8. Remove the cake pan with the chocolate ice cream from the freezer, then pour the chocolate fudge over the ice cream and spread into an even layer. Freeze for about 10 minutes.
9. Add the cookie crumbles to the top of the fudge layer, then freeze for about 2 hours, until mostly firm.
10. About 20 minutes before you need it, set the vanilla ice cream out to soften. Once softened, stir it up until smooth and creamy. Add the vanilla ice cream to the top of the cake, then freeze until firm, 2-3 hours.
11. Use the clear wrap to lift the frozen cake out of the pan, then place it on a cardboard cake circle or a serving plate. Set it back in the freezer.
12. To make the whipped cream, add the heavy whipping cream, powdered sugar and vanilla extract to a large mixer bowl. Whip on high speed until stiff peaks form.
13. Frost the cake with the whipped cream and decorate as desired. I used Ateco tip 844 for piping the borders.
14. Freeze the cake until ready to serve. Cake is best when stored well covered and eaten within 4-5 days.
Notes
I like using the 8×3 inch cake pan and having a taller cake, but if you don’t have one of those pans on hand and don’t want to purchase it, you could also use a 9 inch pan (including a springform pan). The cake just won’t be as tall.
Nutrition
- Serving Size: 1 slice
- Calories: 661
- Sugar: 50 g
- Sodium: 118.6 mg
- Fat: 46.3 g
- Carbohydrates: 55 g
- Protein: 8.4 g
- Cholesterol: 173.7 mg
Keywords: dairy queen ice cream cake, ice cream cake recipe, homemade ice cream cake, how to make ice cream cake, best ice cream cake, chocolate ice cream cake, dairy queen ice cream cake recipe


Needs to freeze longer. 3 hours and it was still soft on the bottom and completely ruined and came apart once pulled from the pan. I should have trusted my gut and left it over night. Now I have to go buy one because I don’t have time to make another.
Same thing happened to me. I was luckily able to save it but it was a huge mess. The outcome was tasty but I would say freeze it as long as you need to. 3 hrs isn’t enough at all.
Could you use a glass 9×13 instead?
Sure. I know plenty of people have commented that they’ve used a 9×13 pan before.
Making this currently and realize I only have milk chocolate chips for fudge layer. Can I use these or will it change the texture?
It may affect the texture and make the fudge layer softer. Without testing it, it’s hard for me to know if it’ll create a big problem or not.
This recipe is ok
Put fudge layer over chocolate ice cream and froze again I think you need to let fudge layer chill before putting on ice cream my ice cream came through the fudge layer otherwise everything else was ok
★★★★
Making this this weekend for my fiancés birthday!! So excited! For the chocolate chips, is it 1 cup plus 6 oz. Or is it 6oz. to 1 cup?
Thank you!!
6 ounces is equal to 1 cup. So you need 1 cup (or 6 ounces), depending on how you prefer to measure. Does that help?
Did you smooth the oreos in a bag or blend them up? My first batch of oreos burned on 350 for 10 min. Not sure what I did wrong, they’re hard to keep an eye on because they’re already black, I couldn’t tell they were burned until I taste tested.
I use a food processor to grind them into crumbs. When they look kind of like they are melting together a bit, they are likely done.
My family just loved it. They said it was better than the one we usually buy. I will be making it from now on!!!!
★★★★★
Awesome! So glad it was a hit!
I made this cake for a summer BBQ and it was so delicious that everyone thought it was from DQ. Thank you for sharing!
★★★★★
Awesome! So glad it was a hit!
I am trying this as we speak. Do we scrape the filling out of the cookies first or use the entire cookie to make the crumbs?
You don’t have to scrape out the filling. Just use the entire cookie.
This looks amazing! I would like to make it with frozen custard and a layer of the Oreo on the bottom! Would there be any contraindication to making those changes? I know custard will melt faster. Would love to know your thoughts on these substitutions and addition of the Oreo layer
★★★★★
Having not used those particular things, it’s hard for me to say. I think the Oreo on the bottom sounds tasty, but may be a little bit crumbly.